Thursday, September 17, 2009


Time for another blog update. It's obvious that I am not a good blogger but I hope I am a better airplane maker. I have made good progress these last ten weeks. Here are some photos of construction of the empennage.The bird finally has tail feathers and is starting to look like an airplane.


This photo of the anti-servo tab used for trim on the stabilator indicates the quality of the design of this plane. I've flown two other planes with this design, a Piper Warrior and a CT and I always wondered how they worked. Now I know.


The tail cone is being joined to the fuselage. This looks exactly like a photo taken in the Boing plant when they join the fuselage together for the 747, except a little smaller. My workforce is smaller too.
This is my total crew. Having a "sky hook" makes a lot of tasks much easier.

The fitting of the polycarbonate turtle deck back light. This started out to be very difficult until I remembered other bloggers stating that working with the canopy is safer and easier if the environment was warm. I inserted an electrical resistance heater in the baggage compartment and let the temperature stabilize around 99 F and over a three hour period, gradually inserted the clecoes until all of the holes lined up. Then match-drilled the roll bar, removed the polycarbonate and tapped the numerous holes to a 6-32 thread. My consummate skill as a lay machinist was at it's peak until I broke the tap off with only three holes to go. Luckily I was able to break the tap out and salvage the threaded hole. The bloggers also expressed concern about drilling holes in the polycarbonate. It has a tendency to fracture if the correct drill bit or technique is not used. I did purchase a special drill bit for drilling plastics and also brought an old hand powered drill at an antique show last month. The combination of those allowed a successful completion of enlarging the holes in the polycarbonate.


There she is, empennage kit complete. The wings, fuselage and empennage kits basically complete the structure of the airplane. The finishing kit has been ordered with expected arrival about 4-6 weeks. Then there is the avionics kit and the engine kit. Total build time to date has been 542 hours. Van's indicates about 600-900 hours to build sans paint. I won't make the 600 mark but might make the 900 mark.
It would be sweet to fly to Oshkosh next July...


Monday, June 29, 2009


Now at 391 total hours.
I just returned from a two week jaunt to Alaska and California visiting my two sons. Not a good excuse for being slow on updating this blog but it is the best I can come up with..

The fuselage kit needs only interior painting, some additional rivets, the 1/4" return fuel line and the fitment of the turtle deck backlight. This sounds like "just a few" items but I'm sure they will be demanding.
I intend to turn the fuselage on it's side which should then allow me to complete the fuel lines and commence interior painting while standing comfortably. Otherwise its like working over a deep bathtub.


No major problems have occurred to date, thanks to Marty's and Jerry's blogs and Van's most excellent plans. I've read their blogs prior to starting various sections and they have saved me much time and re-do work.
This section was much more complicated than the wing section - many more and different pieces. When the shipping box first arrived, it didn't seem like there was that much to it


Once the pieces and parts started to come out of it, the parts count grew tremendously.
I received a notice from Van's that kit#3, the empennage and tailcone was shipped three days ago. Perhaps it will be here by the Fourth of July. Gotta get busy.
I am looking forward to Oshkosh this year, especially if any pioneering RV12s might make it. I sure hope so.
I am intending to ride my Valkyrie to Wisconsin and spend three days and four nights (Wednesday - Friday).
I was able to sell my Zodiac rudder that I built at the Zenith rudder workshop through Barnstormers. The fellow who bought it says he has built a number of planes and flies an AT6.
I hope to meet Marty and Jerry and the rudder buyer in Oshkosh and any other interested aviation enthusiast. I'll be staying at Boelters adjacent to the ultralight area.
See you in Oshkosh.

Sunday, April 12, 2009


Fuselage work continues. Three hundred and five hours have gone into the project. The lower fuselage from the firewall back to the end of the baggage/fuel tank floor area has been completed.


No major mistakes have been made to date but availing myself of the knowledgeable builder assist services at Vans has made my progress steady and uneventful.

I also am following Marty's and Jerry's builder blogs (very detailed and informative), intending to use their experiences to supplant my lack of knowledge. Of course, one of the times that I skipped reading their blogs prior to a major assembly point, I realized I should have.


I had already attached the lower front fuselage to the middle section and then I read Marty's blog. He stated that it would be much better to attach the F1207 E&L vertical supports to the front of the middle section before attaching the front section to it.
Oops!
The problem is that there is minimal room to get a rivet puller in the tight area after the front section is attached. There are four rivets for each vertical support. The rivets can be inserted but due to the curvature of the belly skin, there is no room for a straight pull.


I had already made an angle plate to allow pulling rivets when they are too close to a bulkhead to permit a straight pull. I made a much smaller version and used a small, 40-year old Montgomery Ward rivet puller to successfully pull all eight rivets flush and square. Hooray!

The next step is bending the aluminum angle longerons to fit the curvature of the mid-fuselage.

Sunday, March 1, 2009

Fuselage work continues...

At this point, I am at 245 hours of build time and just finished attaching the seat assembly ribs to the center section bulkhead.


This section of assembly is more detailed and varied from the wings portion. There are many more parts, fasteners and hardware pieces that have to be identified and used.


I did a thorough inventory of all parts short of counting the quantity of different rivets and then listed the location of each bag of hardware and miscellaneous parts as I secreted them throughout the house. The spare bath tub is an excellent repository for big pieces and buckets of little parts. Under the bed has space for large panels and long pieces.
There are two other RV12 bloggers (Marty's RV 12 and Jerry Greenburg's RV12) who have created blogs that are terrific for their detail and content. They are far ahead of me and I often read over what they have done in the section I am working on. In fact, if I would have read Marty's blog yesterday before I cut the hinge sections for the seat backs, I wouldn't have messed it up and might now have to buy more hinge material.

Tuesday, February 10, 2009


At 191 hours the flaperons are completed. It took longer then I thought it should but then again, I never did anything like this before. The error I made with the pivot attach brackets was corrected by ordering a new piece of AEX and building new brackets. The comparison photos showing the offset original bracket position to the now corrected bracket makes it worth it. It took about 11 hours total to repair.


The only other problem occurred when riveting the A1207 actuation brackets. The rivet squeezer was too large to allow the manufactured head to sit in the die pocket and the shop head to be formed correctly. The holes were too close to the angle of the bracket. I fabricated a shop head die holder from a piece of 1/2 thick steel and clamped it in a vise. This allowed me to form the shop head with a punch making it flat and square.


The fuselage is next.

Sunday, January 25, 2009

The wings is done, the wings is done!


The wings have been completed and mounted on a rack and put into storage.

The next task is the completion of the flaperons.
This is where the I made my first major mistake.

I jumped at the chance of making the four pivot attach brackets out of the AEX aluminum
extrusion because I could use my layout and machining skills.


Well, the parts came out very well and I was justifiably proud.
Keep in mind the saying "pride goeth before a fall".
The plans require a reference hole to be drilled in the upper left-hand corner. This hole will serve to locate the pivot bracket on the flaperon spar. Then the remaining seven holes are to be match drilled to the spar.

I mounted the pivot bracket, drilled the seven holes for each of the four pivot brackets and then noticed that the two rows of holes in each pivot bracket were not symmetrical with the part centerline.
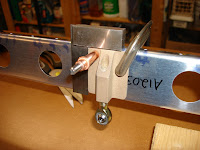
As you can see, the left row of holes is closer to the centerline then the right row. The position of the heim joint that will attach to the wing is not in the center of the hole in the flaperon nose skin.
Where did I make my mistake?
I marked the location of the first reference hole and then set up a jig in my drill press to drill all four pivot brackets exactly the same.
I wasn't careful enough with the jig and introduced a 0.075" lateral position error that then transferred to all four brackets.
I will do better next time.
The design work and the manufacturing of this kit plane continues to amaze me. The fit and quality of parts used is the best it can be.
I did not want to contribute my part if it was not up the the already delivered standards from Vans.
I might have been able to make this work but the two holes don't line up like Van intended.
I ordered new AEX from Vans and will redo the parts correctly.
While waiting, I started to inventory the fuselage kit which arrived three weeks ago. I thought the wings were complex and had many parts.
Well, I ain't seen nothin' yet.
Many different kinds of squeeze rivets and pull rivets and AN nuts and bolts and washers and brackets and levers and buckets of different parts and pieces are coming out of the box.
The people who count the parts, bag them and wrap and package them are masters at their trade. If I were asked to get everything back into the box and close the lid, I would need a steamroller to make everything fit.

.